6 Blooming Gel Nail Art Designs
Blooming Gel is a game changer to help you transform nails into mesmerizing masterpieces with ease. Blooming Gel provides a simple method to achieve the water color aesthetic, marble nails, and more intricate designs in a couple of minutes. Here are a few popular nail designs made with Blooming Gel as well as what it is and how to use it.
What Is Blooming Nail Gel?
Blooming Gel is a clear gel polish that helps create a special blooming effect, similar to how artists use water color. This technique is simple to master, making clients’ nails look like detailed works of art. Blooming Gel allows gel color to drift and create a natural flow of color for a variety of styles and designs.
How To Apply Blooming Gel
Be sure to prep the nails before moving forward with these simple steps:
- Apply 2 in 1 Base.
- Choose a gel nail polish color, and apply it with brushes.
- Cure with our UV/LED nail lamp.
- Apply Blooming Gel.
- Use secondary gel nail polish colors, draw a design, then cure.
- Finish with a top coat like Extreme Shine Top Coat, Glazed Top Coat, or Matte Top Coat, and cure.
By following these steps, you can elevate your nail designs with easy-to-do patterns. Remember that practice makes perfect, so do not be discouraged if your first attempt is not flawless. The beauty of Blooming Gel is that you can create amazing abstract art whether it was intentional or accidental. Blooming Gel mixes with as many colors as you would like to create a water color effect. You can use this technique to create several nail art designs, including but not limited to:
- Marble
- Natural stone
- Water colors
- Floral print
- Tie-dye
- Gradients
- Animal print
How To Create Blooming Gel Nail Art
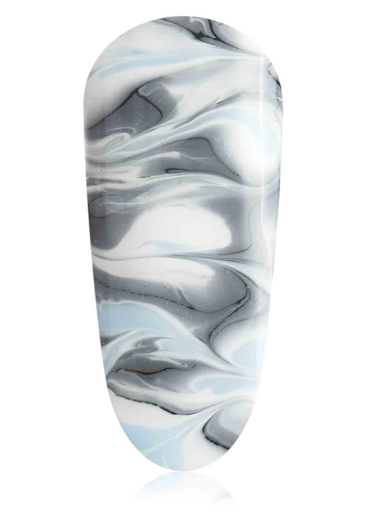
Marble
If you are going for a marble look, then after you apply Blooming Gel and a color, use a small detail brush to pull a secondary color into swirls or various directions. The Blooming Gel will create a water color effect with the shades and fades of the colors.
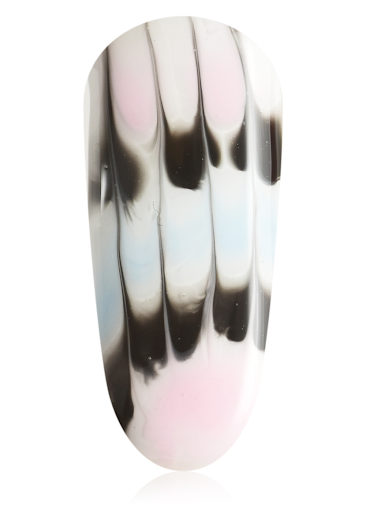
Colorblock

To create a colorblock design, use a gel polish color that will stand out against the primary gel polish. Start with your base color, cure it completely, then add a thin layer of Blooming Gel. On top of the uncured Blooming Gel, apply your next color in soft organic lines, and watch the color spread. Do this down the length of the nail, where you can create multiple rows of these blocks of color. Depending on the type of colorblock, it can sometimes result in a fun animal print.
@yaaas_get_nailed used TGB She-Wolf, Jet Black, and Blooming Gel.
@zoehannahnailartist used TGB Electric Blue, Michelle, and Blooming Gel.
Water Color
For an abstract water color design, start with your base color, and cure it completely, then add a thin layer of Blooming Gel. On top of the uncured Blooming Gel, apply your next color with fluid brush strokes. You can use multiple colors, blending a few before they dry, and include a strong accent color. Your desired nail design determines the number of colors you should mix before curing this layer of gel polish. If you want overlapping colors that do not mix, then you will need to add and cure another layer of Blooming Gel and your new colors. Finish off with a top coat, and cure.
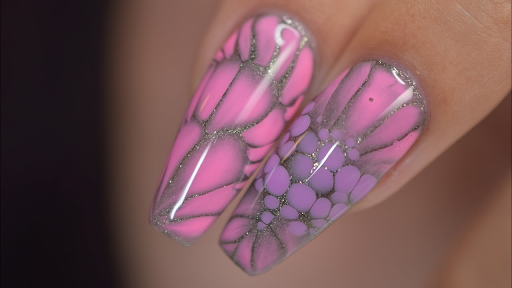
Floral

For flowers, you typically follow the same technique you would for regular floral designs, except this time you are creating it on top of Blooming Gel. Start with your base color and cure it completely, then add a thin layer of Blooming Gel. On top of the uncured Blooming Gel, add your dots for the flowers; five or six dots in a circle will usually suffice for a flower. You can add colored petals, or you can add dots in the center of the flower. We recommend leaving a little extra space between the petals for the Blooming Gel to work its magic and create the smooth gradient effect. Cure once you are happy with the design.
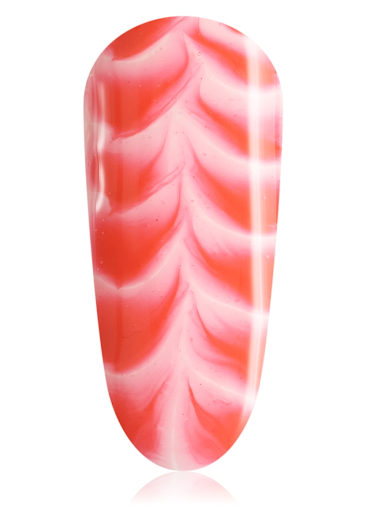
Tie-Dye
For tie-dye nail designs, all you need are your colors and a detail brush. Start with your base color, cure it completely, then add a thin layer of Blooming Gel. On top of the uncured Blooming Gel, start adding spots of your desired colors — make sure to leave spaces in between each spot. Once you apply all the colors, wait a few seconds to let the Blooming Gel spread. Once your colors have bloomed, drag your detail brush through the line of colors toward the center. Cure to set in place.
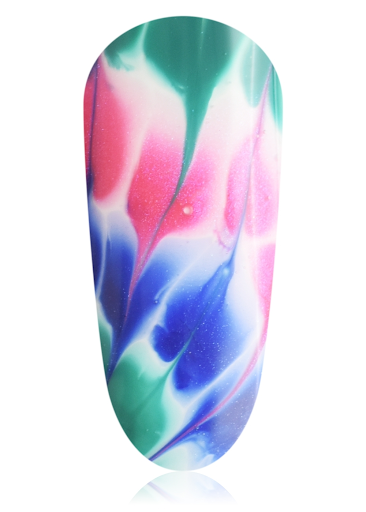
Abstract Swirls
Abstract swirls may be the easiest way to use Blooming Gel, and it always comes out looking intricate. Start with your base color, cure it completely, then add a thin layer of Blooming Gel. On top of the uncured Blooming Gel, use a detail brush to add in swirls of different colors. The longer you wait to cure the nail art, the more the Blooming Gel will spread, mixing the colors together. Cure once you are satisfied with the swirls. You can also consider topping it off with little details like stars or foils!
@madelineelizabethx using TGB Royal Navy, Dawn, and Daisy
These are only a few of the possible application methods for Blooming Gel, so unleash your style, and create your nail art! Show us what you come up with by tagging @the_gelbottle_inc on Instagram and using the hashtag #gelbottleblooming.
Why To Choose TGB Blooming Gel
Blooming Gel is an easy tool to achieve a variety of nail art styles, and TGB Blooming Gel provides long-lasting results for up to four weeks. Not only is the application process simple, but so is the removal process. This nail gel needs to be soaked in acetone for about 10 minutes before you can file away leftover gel.
It is a simple-to-use, convenient method to offer to your clients who want a new or unique design. With these six different nail looks, anyone can wear Blooming Gel. Stay up to date with popular gel trends and colors. Create your pattern by using classic colors for the season that never go out of style.