Nail Tech Tips: Common Gel Polish Application Mistakes To Avoid
As an upcoming nail technician or a seasoned artist diving into the world of gel nail polish, it is natural to feel a bit overwhelmed by the potential mistakes awaiting. But fret not! We have assembled a list of nail technician tips for some of the most frequent pitfalls and how to navigate around them.
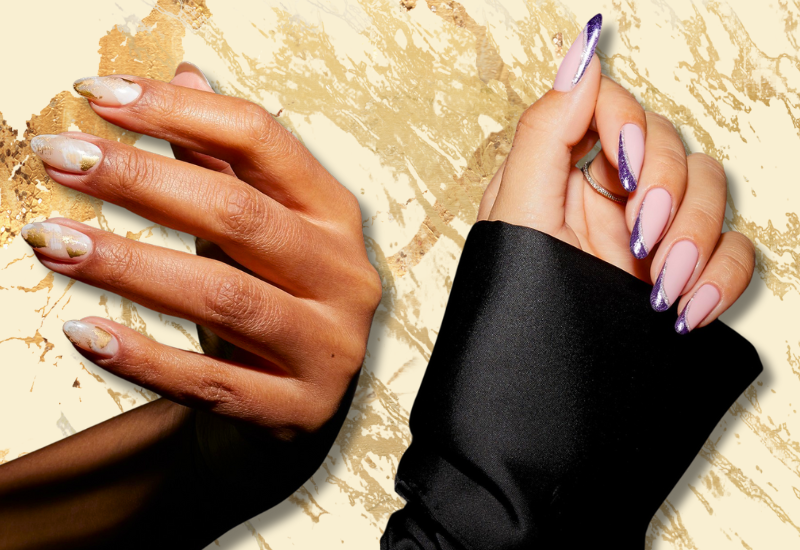
How To Apply Gel Nails
Applying gel nails with precision can make all the difference in achieving a flawless finish. Here is a comprehensive guide:
- Prep: Begin by cleaning the nails thoroughly. Push back the cuticles, and buff the nail surface lightly to create a smooth canvas.
- Apply a base coat: Apply a thin layer of a gel base coat.
- Cure the base coat: Place the nails under a UV or LED nail lamp. With The GelBottle Inc, curing takes around 45 seconds with LED or 2 minutes with UV.
- Apply a gel color: Apply a thin layer of a gel color polish. For vibrant colors, two coats may be necessary.
- Cure the color layers: After each coat, cure the nails under a UV or LED nail lamp. Ensure you are curing for the recommended time to avoid issues.
- Apply a top coat: Once the color is cured and you are satisfied with the opacity, apply a thin layer of top coat.
- Final cure: Cure the top coat under a nail lamp. Some top coats, like The GelBottle Inc nonwipe Extreme Shine, Glazed, Matte, or Glow Top Coat, provide a long-lasting finish without the need for wiping off any sticky residue.
- Hydrate and protect: Once done, apply cuticle oil to the cuticles, and moisturize. This ensures not just beautiful but also healthy nails and hands.
Do You Need a Base and Top Coat for Gel Nails?
The answer is a resounding yes. The base and top coats are like the bread in a sandwich, which is essential for holding everything together.
Importance of Base Coat
A base coat serves as a protective layer between the nail and the gel polish. By applying it, you ensure the nail is shielded from potential staining. Moreover, the base coat promotes better adhesion of the gel polish to the nail, preventing early chipping or peeling. With The GelBottle Inc, users benefit from a 100% gel formula that ensures maximum adherence. In addition, with no need for primers, the process is streamlined without compromising on quality.
Significance of Top Coat
The top coat is your final seal, the protective barrier that shields your color from external elements. It offers that dazzling, extreme, long-lasting shine or velvety matte look that makes gel nails so popular. Furthermore, it extends the life of your manicure and pedicure, making sure your nails look freshly done for longer.
Base Coat Application
- After buffing and preparing the nails, apply a thin layer of the base coat.
- Cure under a UV or LED nail lamp; for products like The GelBottle, it takes around 45 seconds with LED or 2 minutes with UV.
Top Coat Application
- After the gel color has been cured, apply a thin layer of the top coat.
- Seal the free edge with the top coat to prevent the gel polish from chipping.
- Cure again under the lamp.
How To Fix Gel Nails That Are Too Thick
If you've applied your gel polish too thickly, use a fine-grit buffer to lightly buff the surface. Thickness issues can plague even the most experienced technicians, but there are ways around it.
The Art of Layering
Gel polish is designed for layering. Instead of applying one thick layer, aim for multiple thin, even coats, curing between each. This method ensures optimal durability and appearance.
Using Builder Gel
For those who are looking to add strength or length, The GelBottle Builder in a Bottle, also known as BIAB™, is a revolutionary product. This self-leveling soak-off builder gel system assists technicians in achieving a uniform thickness without the product becoming overly bulky.
Armed with this knowledge, professionals can elevate their gel nail applications, ensuring satisfaction for every client. Beginner nail tech classes, like the programs offered by the TGB Academy, are a surefire way to remain at the forefront of the industry.
How To Thin and Fix Thick Gel Polish
Thickly applied gel polish does not just look unprofessional, but it is also more prone to premature lifting and bubbling. The GelBottle emphasizes the use of multiple thin layers, allowing for even curing and a smoother finish.
Gel nail polish might become thick due to various reasons like prolonged storage or temperature fluctuations. Here is how to handle thick gel polish:
- Check the bottle: Ensure the polish bottle is sealed properly. Give it a good shake, as sometimes the polish might just need a bit of mixing.
- Warm the bottle: Place the bottle in a bowl of warm water for a few minutes. The warmth can make the polish thinner, more manageable, and easier to apply. Ensure the cap is tightly closed to avoid water seepage.
- Use a gel polish thinner: Professional brands like The GelBottle offer gel polish thinners that restore the polish's consistency without compromising its quality. Add a few drops, and mix well. Avoid using acetone or nail polish remover as it can degrade the quality of the gel polish.
- Stir the polish: Use a clean cuticle stick to stir the gel polish inside the bottle. This can help break down any clumps and ensure a smoother consistency.
- Test the consistency: Before applying, test the thinned polish on a nail tip or palette to check its consistency. If it is still too thick, you may need to repeat the thinning process.
Note: Always store your gel polishes in a cool, dark place to maintain consistency and prolong their shelf life.
Is the Gel Base Coat Supposed To Be Sticky After Curing?
It is typically sticky. Learn why below.
The Tacky Layer
This sticky residue, often referred to as the inhibition layer, plays a critical role. It aids the subsequent color coat in adhering better to the nail. However, it is essential to ensure you are curing for the correct duration. With The GelBottle products, cure for 45 seconds under an LED nail lamp or for 2 minutes under a UV nail lamp.
After Application
Once the final color layer is applied and cured, the tacky layer can be removed with a lint-free wipe soaked in a cleanser. This step will reveal a high-shine, smooth finish, especially when using any of The GelBottle nonwipe top coats.
How To Not Get Gel Polish on Skin
- Use a fine brush: This allows for more precise application.
- Clean up immediately: If you accidentally get polish on the skin, use a cleanup brush dipped in acetone to remove it before curing. Ensuring gel polish does not end up on the skin is more than an aesthetic concern.
Skin Safety
Cured gel on the skin can lead to potential allergies or sensitivity in some clients. It is imperative to ensure that no gel polish touches the skin. If it does, it should be cleaned, especially before curing.
Precision Is Key
A crucial skill every nail technician must develop is precision; the more precise the application, the cleaner and more professional the finish. A cleanup brush dipped in remover or cleanser is an invaluable tool to help correct any minor mistakes before placing the hand under the curing lamp.
Mastering Gel Polish Application With The GelBottle
Perfecting gel polish application is a journey of continuous learning and adaptation. By understanding the nuances of each step and the common pitfalls, nail technicians can ensure flawless, long-lasting manicures every time. The GelBottle, with its innovative products and a commitment to quality, provides the necessary tools and guidance. So, whether you are just starting or have years of experience under your belt, remember that each manicure is a blend of artistry and science. Stay informed, keep practicing, and let your clients' dazzling nails be a testament to your expertise.